

Your Boondock Echo.
Ready in a few steps.
Purchased your Boondock device through Ham Radio Outlet? Start here. Create your account, connect and register your device, choose a subscription, and begin using your Boondock dashboard.
Four things to complete first
Follow one clear path from opening the box to seeing your device online.
Create account
Register or sign in to your Boondock account.
Connect device
Connect the radio, power, and network connection.
Register device
Add your Boondock device in the dashboard.
Subscribe & use
Select your plan and start using the dashboard.
Follow the screens, step by step
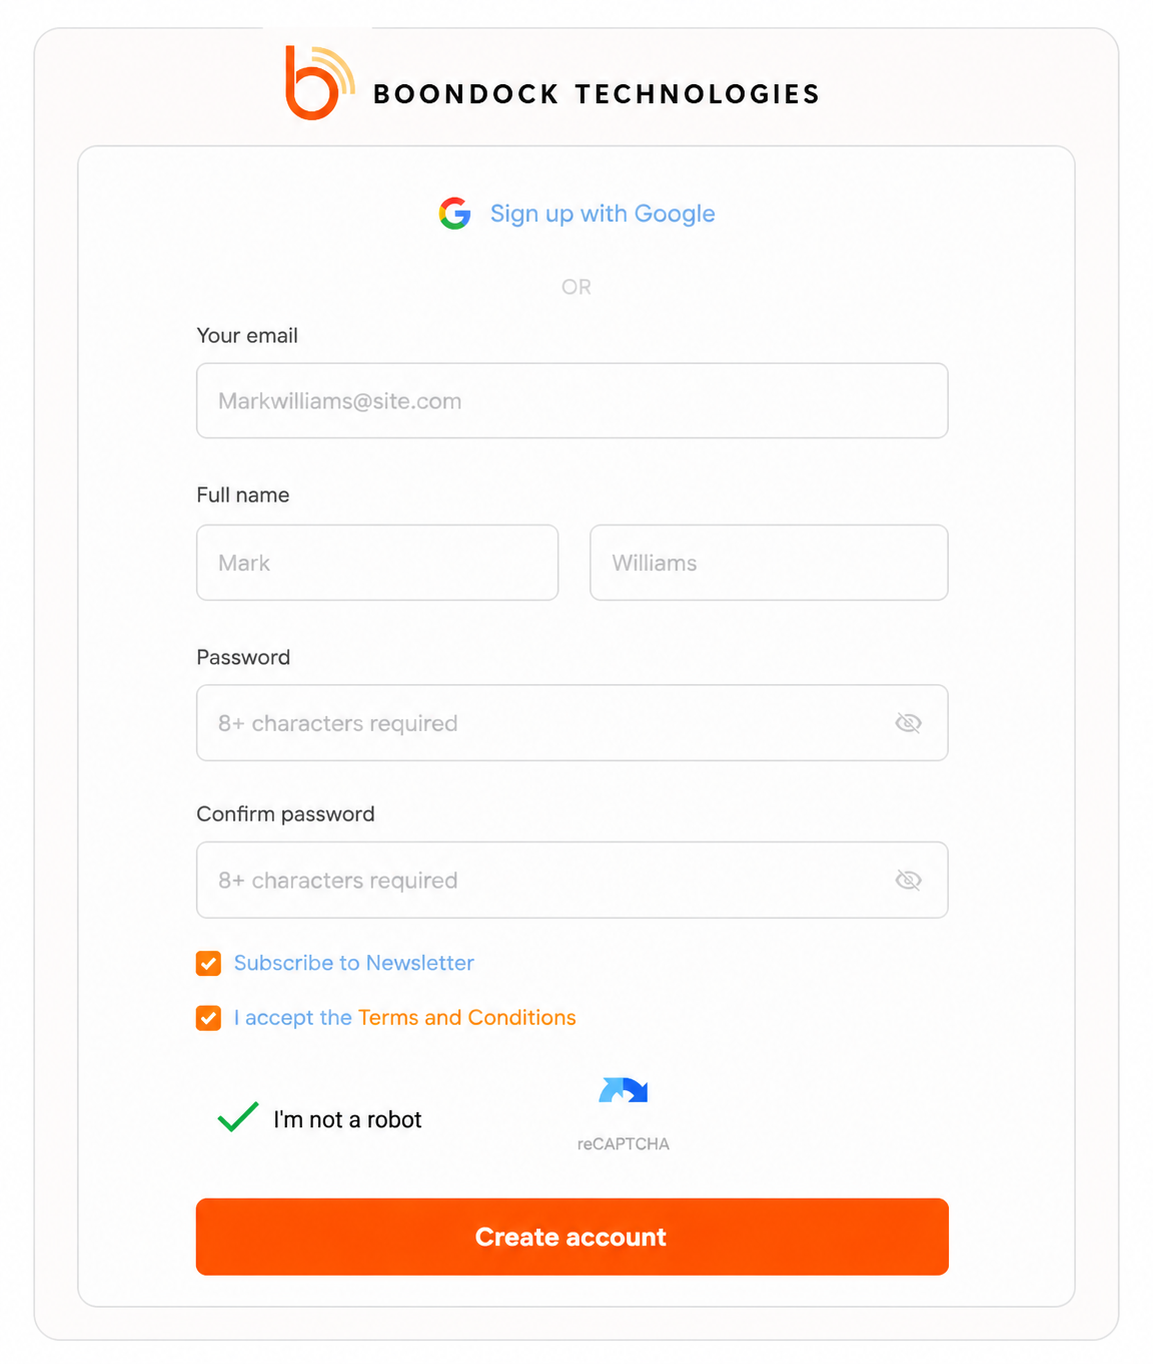
Create your Boondock account
Start by creating your account. If you already have one, simply sign in.
- ✓Open the Boondock account registration page.
- ✓Enter your email, name, and password.
- ✓Accept the Terms & Conditions and select Create account.
- ✓Already registered? Use the Sign In page instead.
Connect and power your device
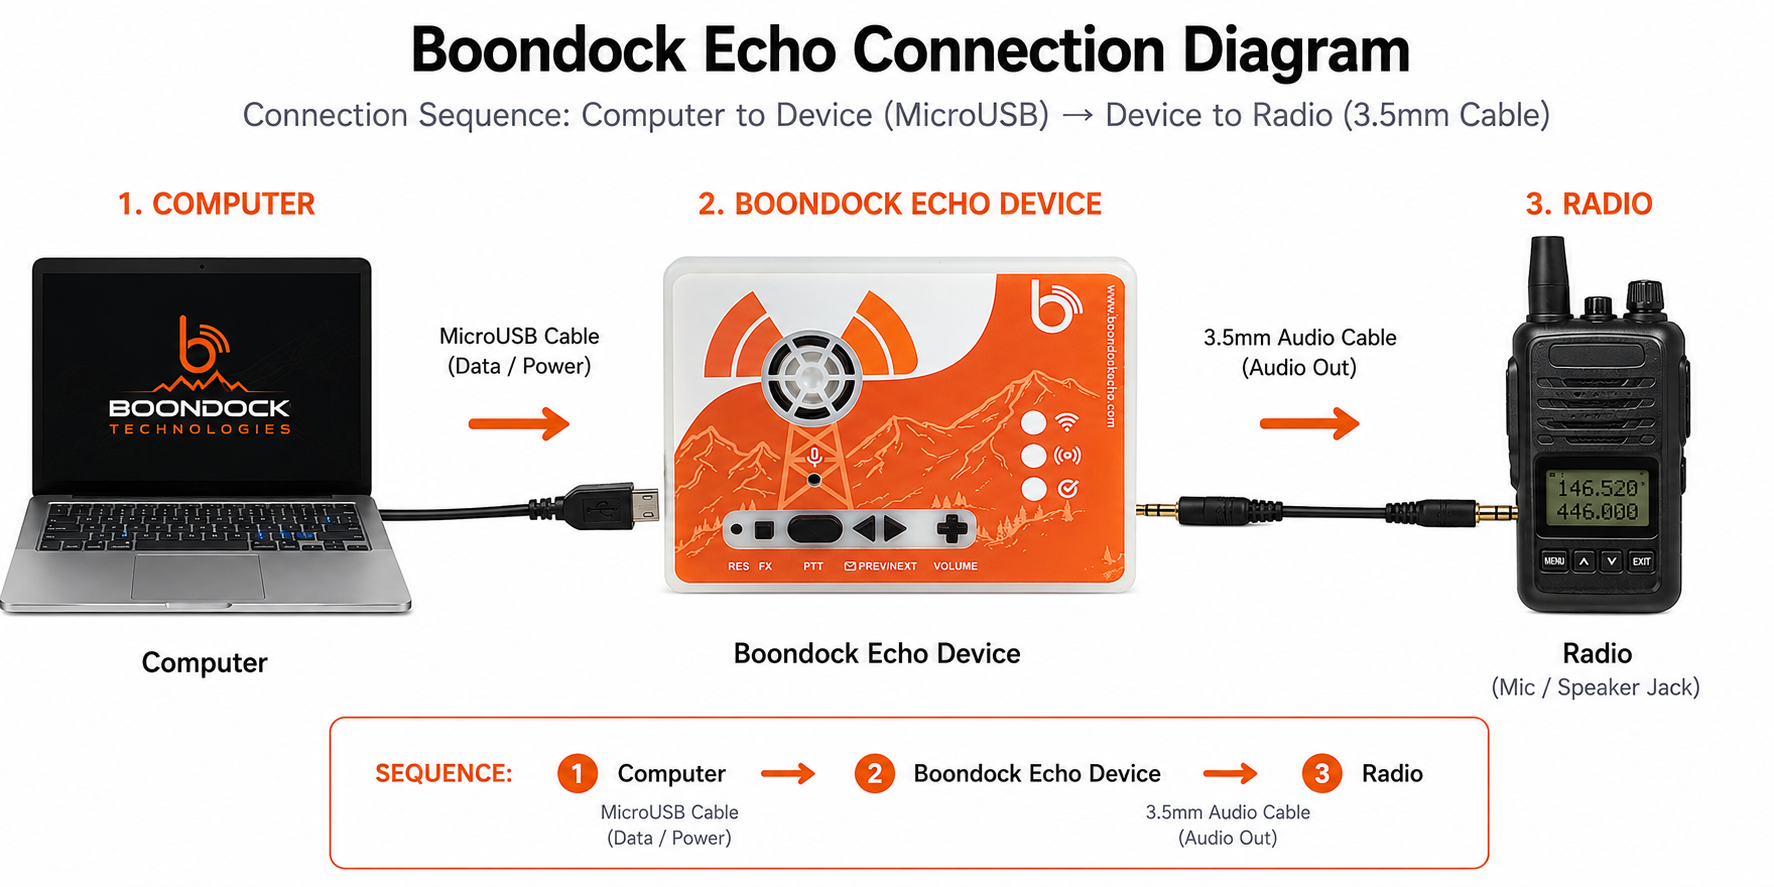
Connect the Boondock device to your radio or scanner and provide power before moving to the online setup.
- ✓Connect the Boondock device to the compatible radio/scanner audio connection.
- ✓Connect USB power to the device.
- ✓Wait for the device to boot before starting network setup.
Connect the device to your network
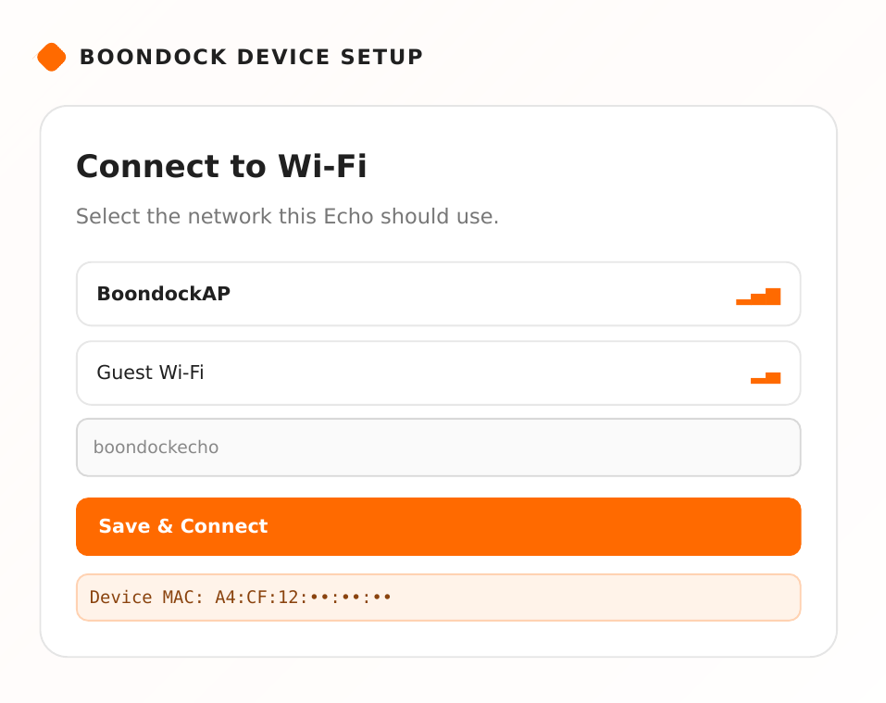
Use the Boondock setup interface to connect the unit to your Wi-Fi network.
- ✓Open the device's setup connection from your phone, tablet, or computer.
- ✓Select your Wi-Fi network and enter the password.
- ✓Save the network settings and allow the device to reconnect.
- ✓Locate the device information/MAC address needed for registration.
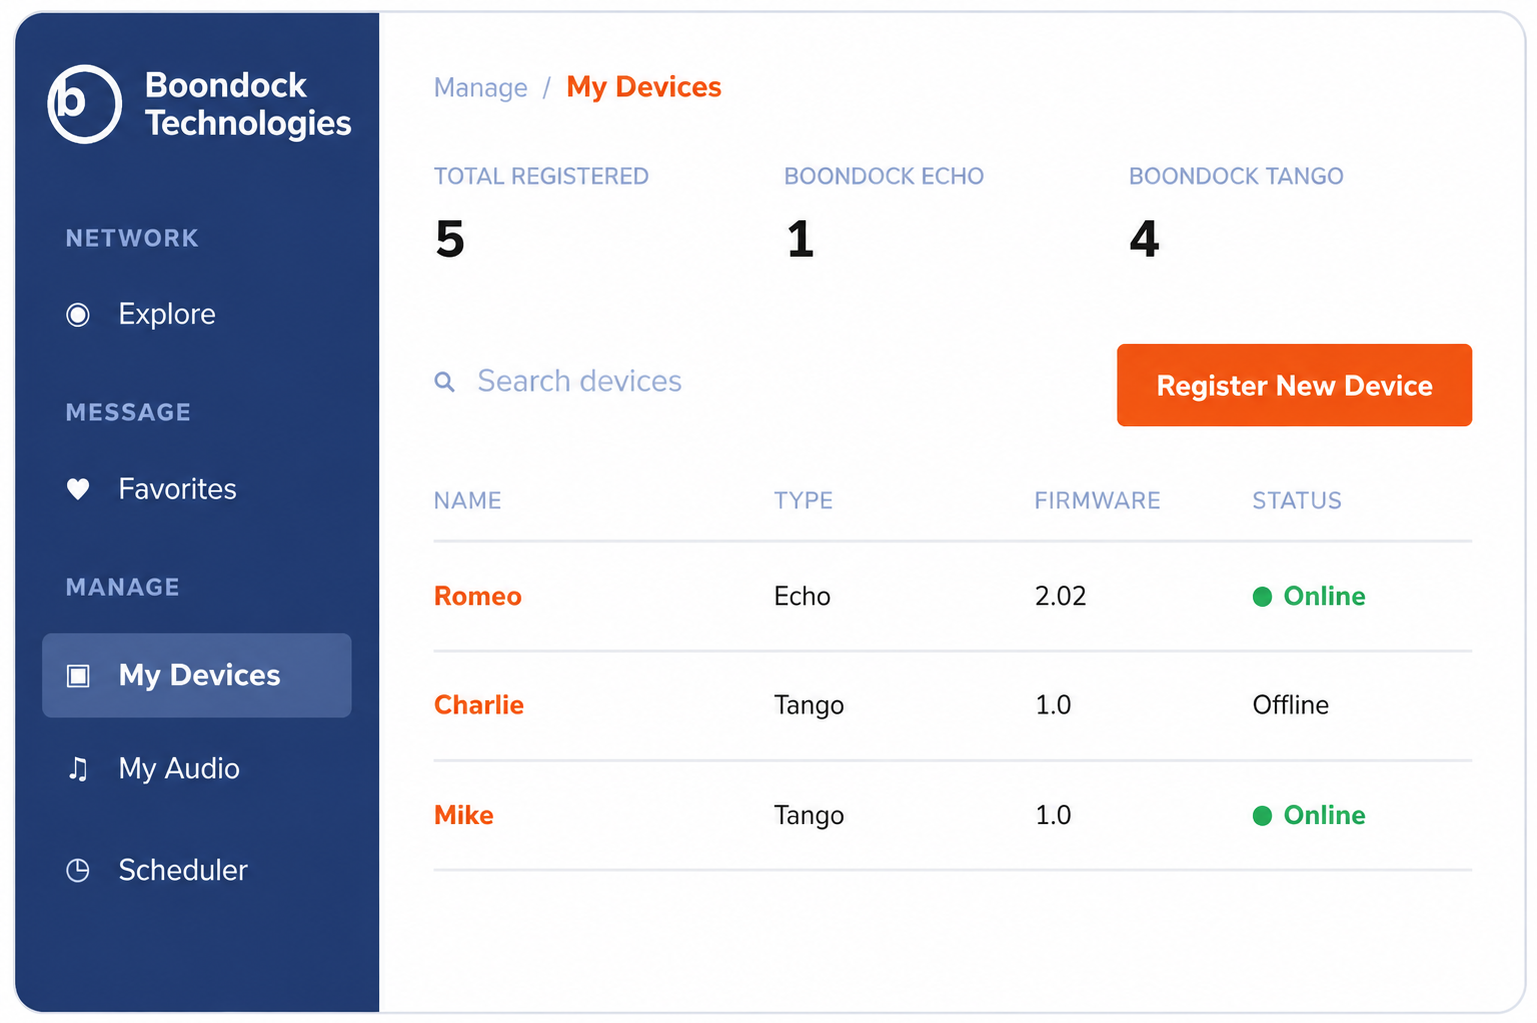
Register your device
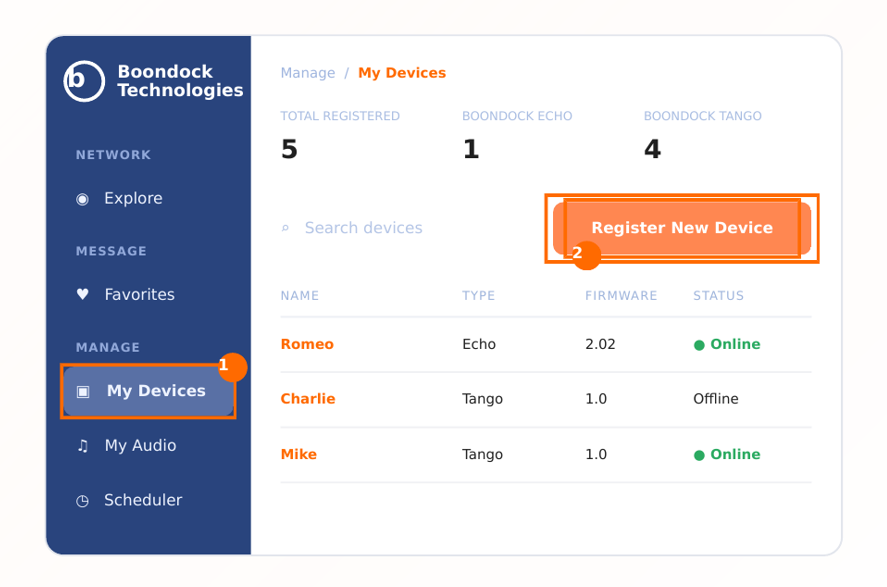
Once the device is connected, add it to your Boondock account.
- ✓Sign in to your Boondock dashboard.
- ✓Open My Docks / device management.
- ✓Select Register New Device.
- ✓Select your product type and enter the requested device information/MAC address.
- ✓Complete registration and confirm the device appears in your account.
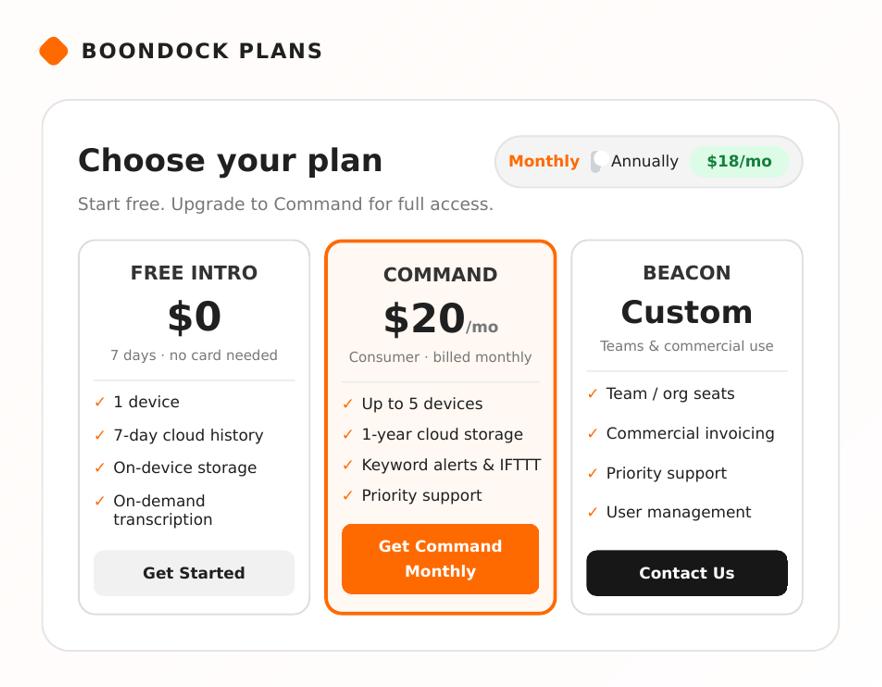
Choose your subscription
If you want subscription features, select the plan and billing option that fits your use.
- ✓Open the Boondock pricing page.
- ✓Review the current consumer subscription options.
- ✓Select monthly or annual billing.
- ✓Complete checkout while signed into the correct Boondock account.
You're ready to use Boondock
Confirm that your device appears online, then explore the dashboard and configure the features you want to use.
- ✓Check that the device shows online in your account.
- ✓Review incoming recordings and playback.
- ✓Configure transcription and other device settings as needed.
- ✓Use the documentation below for deeper setup and troubleshooting.
Everything else in one place
Keep these links visible so HRO customers never need to search for the next step.
Ham Radio Outlet
Return to the Ham Radio Outlet website.
Visit HRO →Boondock GitHub
Open-source projects, code, and technical resources.
Open GitHub →Documentation
Setup guides, dashboard instructions, and product documentation.
View Docs →Account Login
Sign in and manage your Boondock devices.
Sign In →Still having trouble getting connected?
Contact Boondock support and include your device model, device/MAC information, and a short description of where the setup stopped.